IntelliJ IDEA Pluginの作り方
IntelliJ PluginのHello, World.ということで、Hello Pluginというプラグインを作ってみましょう。
ボタンを押すとHello!というNotificationが表示されるプラグインです。
目次
IntelliJ IDEAのダウンロード
Android StudioはIntelliJ IDEAをベースとしたIDEです。
Android Studioではプラグインを作ることができないので、IntelliJ IDEAを使います。
使用するIntelliJのライセンス形態は以下のリンクが詳しいです。
IntelliJ IDEA製品群、ライセンス形態について #jbugj
http://www.slideshare.net/yusukey/intellij-idea-jbugj
03日目 IntelliJの購入方法 #intellij - marsのメモ
http://d.hatena.ne.jp/masanobuimai/20121203
プラグインの開発はIntelliJ IDEA Community Editionでも可能です。 ダウンロードサイトはこちらです。
IntelliJ IDEA :: Download Latest Version of IntelliJ IDEA
http://www.jetbrains.com/idea/download/index.html
今回は以下のバージョンを使います。
IntelliJ IDEA 13.0.2 Build #IC 133.696
インストールは特に迷うことなくすんなりできると思います。
SDKの設定
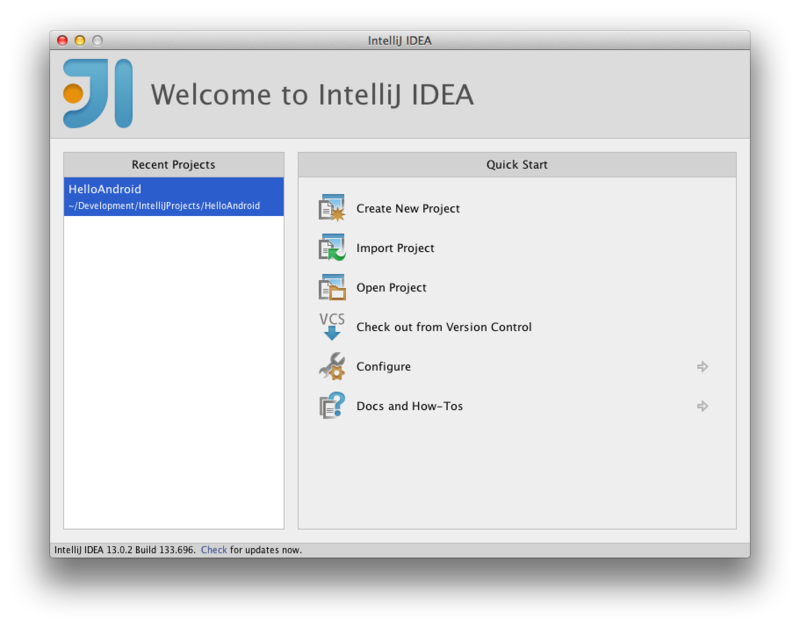
インストールが完了し、初めて起動するとこのような画面が表示されます。
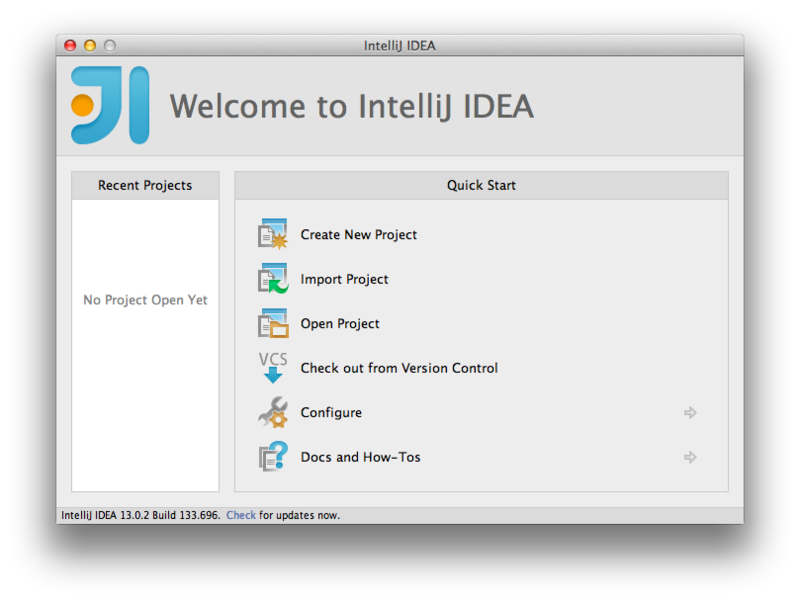
まずはSDKの設定を行います。
[Configure] > [Project Defaults] > [Project Structure] を開くとSDK設定画面になります。
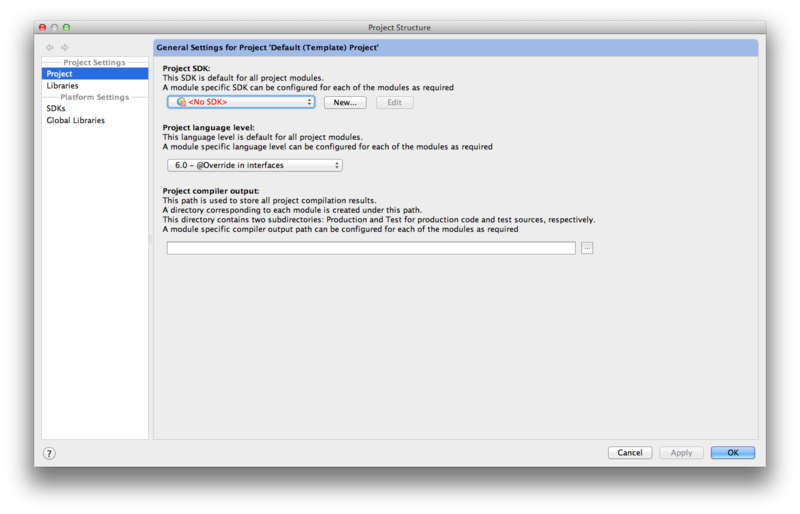
Project SDKがNo SDKとなっているので、[New...] > [IntelliJ Platform Plugin SDK]を選択して新しくSDKを設定します。
ファインダーが表示さるので、"IntelliJ IDEA 13 CE.app"を選択します。
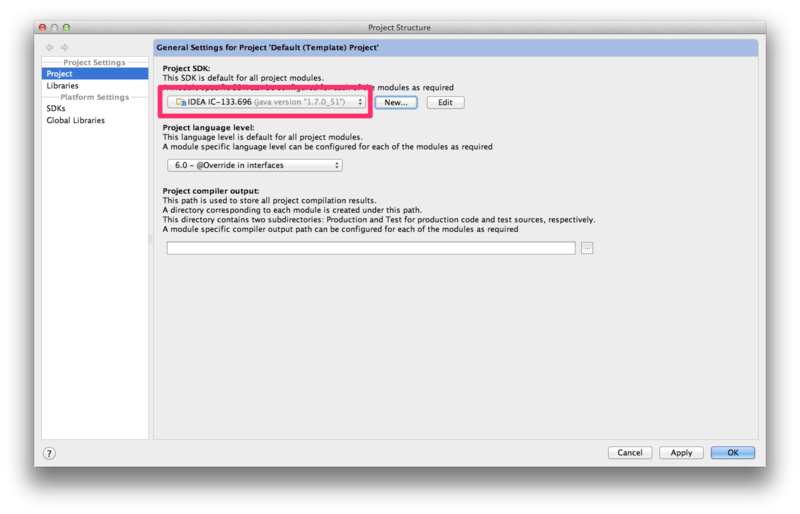
SDKの設定が完了しました。
プロジェクトの作成
早速[Create New Project]からプラグインプロジェクトを作成しましょう。

1つずつ入力していきましょう。
プラグインを作るのでプロジェクトの種類は"IntelliJ Platform Plugin"を選択します。
Project nameには"HelloPlugin"と入力します。
Project locationはプロジェクトを置いておきたい適当な場所を指定しましょう。
Project SDKには先ほど設定したSDKを指定します。
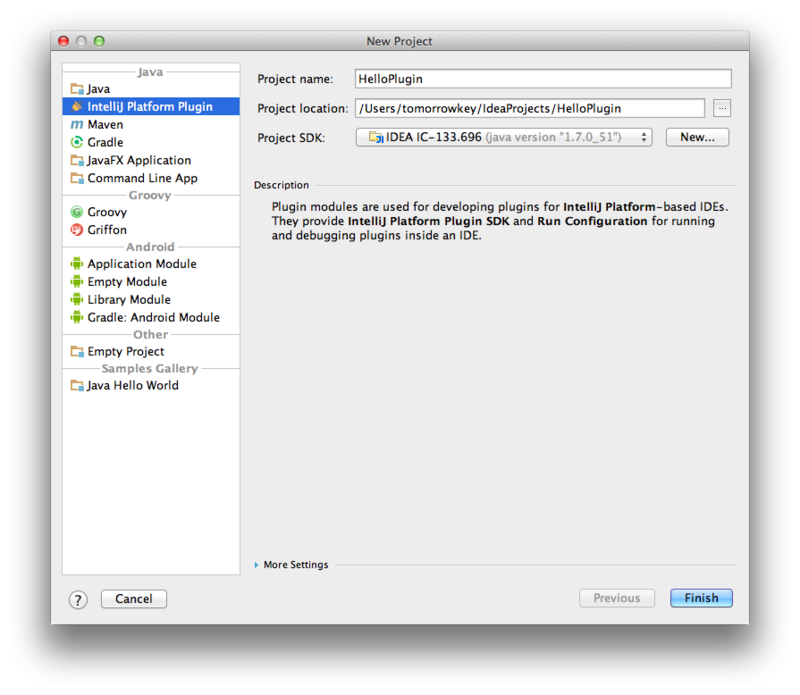
[Finish]を押すとプロジェクトが作成されます。
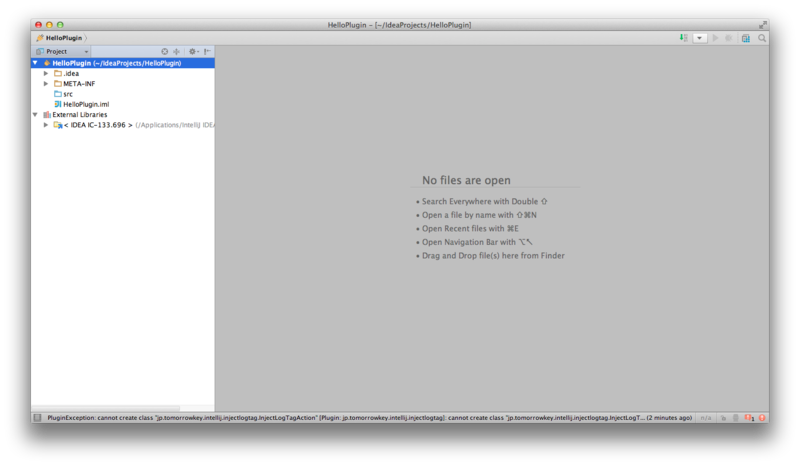
Actionの作成
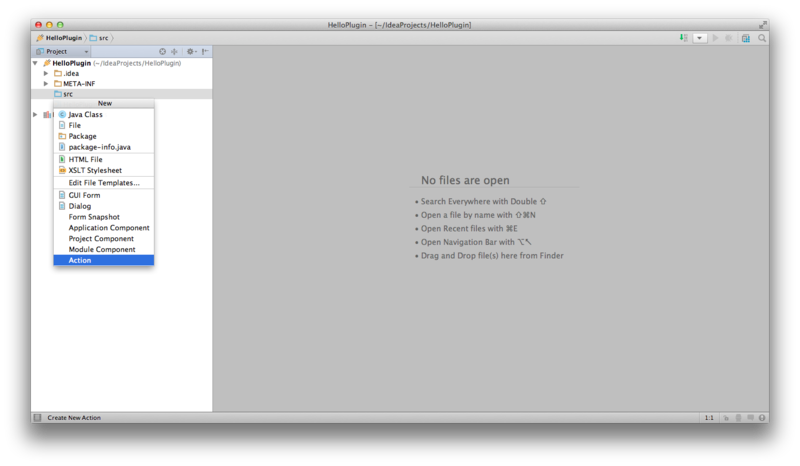
プラグインのエントリポイントはActionです。とりあえずActionを作成しましょう。 /HelloPlugin/src ディレクトリを選択した状態で[File] > [New...] > [Action] を選択します。
たくさんの入力項目が表示されました。
1つずつ埋めていきましょう。
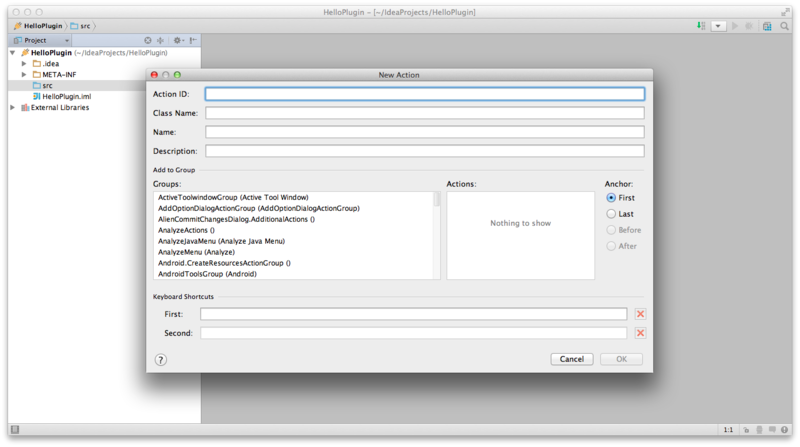
Action ID はプラグインを一意に識別できる値を入力します。"HelloPluginAction"と入力します。
Class Name にはActionクラスを継承したクラスの名前を入力します。パッケージ名+クラス名(例えばcom.example.HelloPluginActionなど)と入力したいところですが、そう入力するとOKボタンを押せないのでパッケージ名は省略して"HelloPluginAction"と入力します。あとでこの値は変更できます。
Name にはActionの名前を入力します。"Hello Plugin"と入力します。
Groups は"Tools Menu"を選択します。これを選択するとToolsメニューに"Hello Plugin"という項目が追加されます。
このアクションはメニューから起動することができますが、Keyboard Shortcutsでショートカットを設定することにより、簡単に起動することができます。"Command + Shift + H"を設定しました。
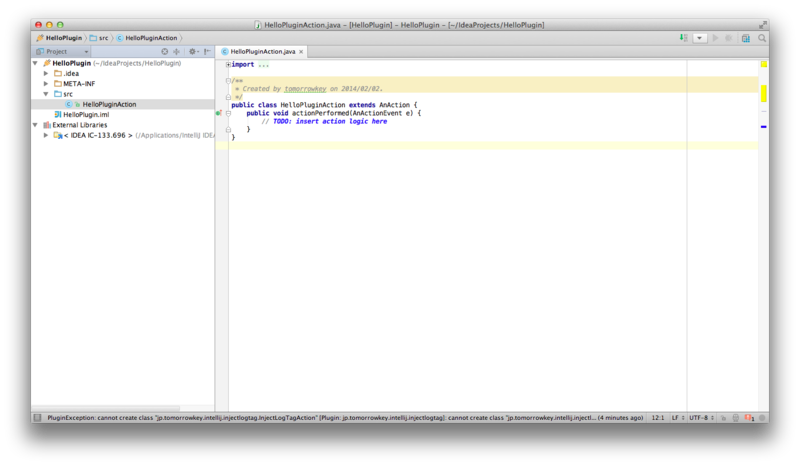
アクションが作成されました。
Notificationの表示
ユーザがPluginの機能を呼び出すと、ActionクラスのactionPerformedメソッドが呼ばれます。
Hello PluginはActionが呼ばれるとNotificationが表示されるプラグインなので、ここにNotificationを表示するコードを書きましょう。
import com.intellij.notification.Notification;
import com.intellij.notification.NotificationType;
import com.intellij.notification.Notifications;
import com.intellij.openapi.actionSystem.AnAction;
import com.intellij.openapi.actionSystem.AnActionEvent;

public class HelloPluginAction extends AnAction {
    public void actionPerformed(AnActionEvent e) {
        String groupDisplayId = "HelloPlugin";
        String title = "Hello";
        String content =  "Hello World!";
        NotificationType notificationType = NotificationType.INFORMATION;

        Notification notification = new Notification(groupDisplayId, title, content, notificationType);
        Notifications.Bus.notify(notification);
    }
}
Notificationオブジェクトを作成し、Notifications.Bus#notify()を呼び出すことでNotificationが表示されます。 これでHello Pluginの完成です。
実行設定
プラグインを実行するには[Run] > [Run...] > [Edit Configurations...] を選択し、実行の設定をします。

左上の[+] > [Plugin]を選択して新しく実行設定を作成します。
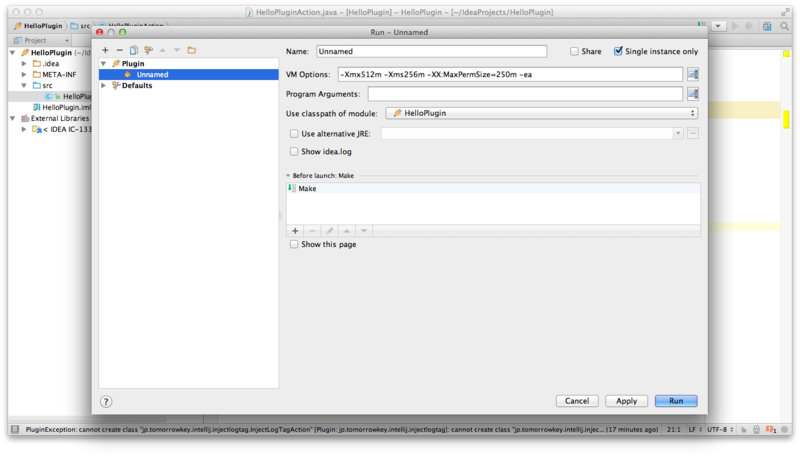
Nameに実行設定の名前を入力します。
Use classpath of moduleにHelloPluginが選択されていることを確認します。
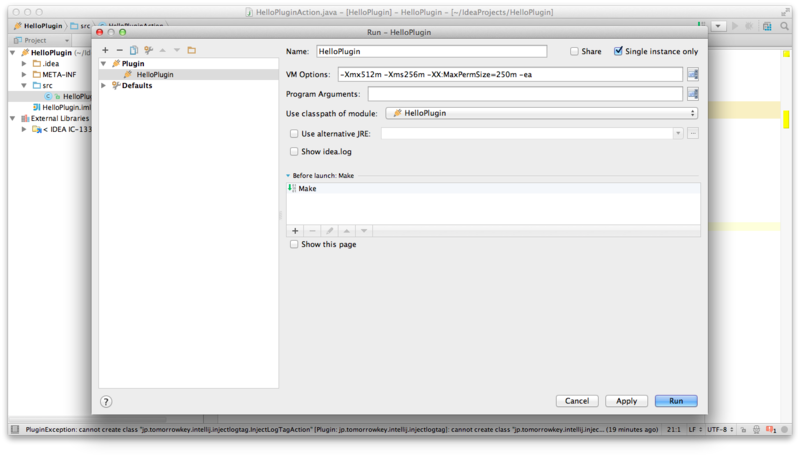
これで実行設定が完了しました。
早速実行してみましょう。
プラグインの実行
[Run]から先ほど作成した設定を選択するとプラグインが実行されます。
いままで使っていたIntelliJとは別の新しいIntelliJが起動します。
プラグインの動作確認するにはプロジェクトが必要なので、適当なプロジェクトを開きます。
プロジェクトを開いた状態でおもむろにメニューのToolsを開くと"Hello Plugin"というメニューがあります。
どうやらインストールには成功しているようです。
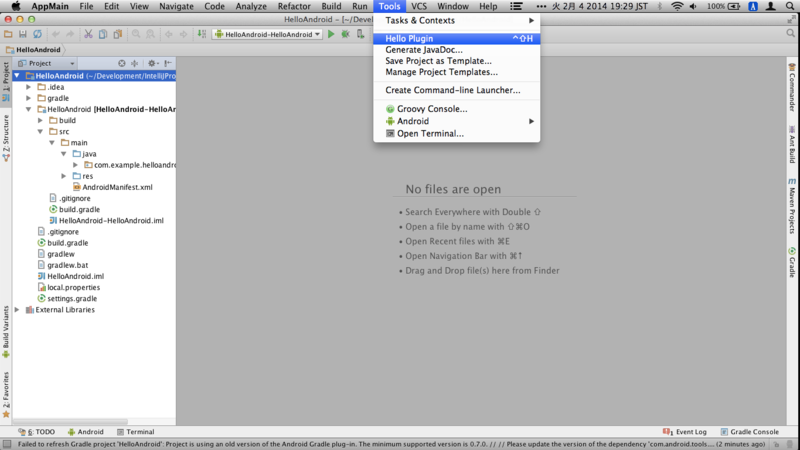
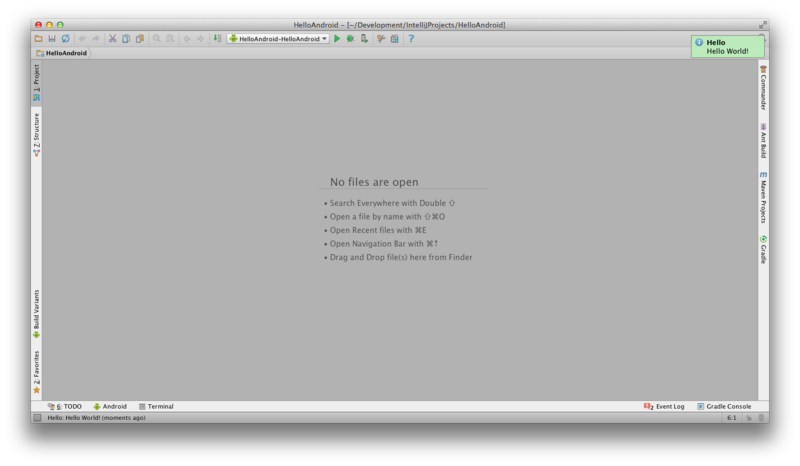
"Hello Plugin"を選択するとノーティフィケーションが表示されました。
表示されている内容はtitleとcontentです。
さらにショートカットから呼び出しもやってみましょう。
Actionを作るときに指定した"Command + Shift + H"を押してみますが、ノーティフィケーションは表示されません。
もう一度メニューを見てみるとショートカットの表示が"Shift + Ctrl + H"になっています。(バグか?)
改めて"Shift + Ctrl + H"を押すと無事ノーティフィケーションが表示されます。
Tips
プラグインの名前を設定する
[Preferences] > [Plugins]を開くとプラグイン一覧が表示されます。
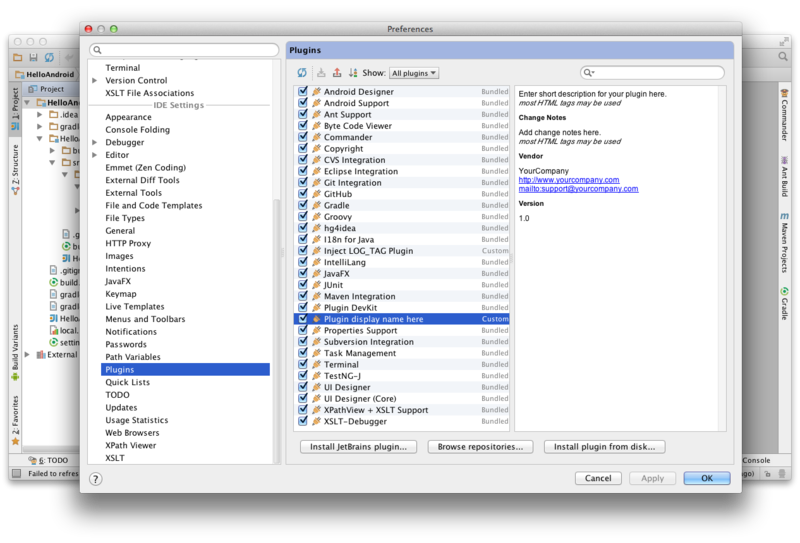
さっき作ったプラグインはというと"Plugin display name here"という名前になっています。
プラグインの名前は別で設定する必要がありそうです。
/META-INF/plugin.xml というファイルを開くとプラグインの名前などを設定できます。
<idea-plugin version="2">
  <id>com.yourcompany.unique.plugin.id</id>
  <name>Plugin display name here</name>
  <version>1.0</version>
  <vendor email="support@yourcompany.com" url="http://www.yourcompany.com">YourCompany</vendor>

  <description><![CDATA[
      Enter short description for your plugin here.<br>
      <em>most HTML tags may be used</em>
    ]]></description>

  <change-notes><![CDATA[
      Add change notes here.<br>
      <em>most HTML tags may be used</em>
    ]]>
  </change-notes>

  ...

</idea>
nameタグにプラグインの名前を設定します。
venderタグやdescriptionタグなども適切な文言を設定するとよいでしょう。
Actionのパッケージを変更する
さきほど作ったHello Pluginではデフォルトパッケージを使っていました。
そのままでは気持ち悪いので、適当なパッケージに変更してみます。
名前を設定したときと同じく/META-INF/plugin.xmlを開きます。
<idea-plugin version="2">
  ...

  <actions>
    <!-- Add your actions here -->
      <action id="HelloPluginAction" class="HelloPluginAction" text="Hello Plugin">
          <add-to-group group-id="ToolsMenu" anchor="first"/>
          <keyboard-shortcut keymap="$default" first-keystroke="shift meta H"/>
      </action>
  </actions>

</idea-plugin>
actionタグのclass属性に実行するアクション名が指定されています。
クラスのパッケージを変更して、この値を変更すればよさそうです。
ショートカットを変更する
これもまた同じく/META-INF/plugin.xmlに設定があります。
<idea-plugin version="2">
  ...

  <actions>
    <!-- Add your actions here -->
      <action id="HelloPluginAction" class="HelloPluginAction" text="Hello Plugin">
          <add-to-group group-id="ToolsMenu" anchor="first"/>
          <keyboard-shortcut keymap="$default" first-keystroke="shift meta H"/>
      </action>
  </actions>

</idea-plugin>
keyboard-shortcutタグのfirst-keystroke属性を変更すればショートカットを変更できます。
参考にしたリンク
PluginDevelopment - IntelliJ IDEA - Confluence
http://confluence.jetbrains.com/display/IDEADEV/PluginDevelopment
IntelliJ IDEA: GoogleSearch Plugin for IntelliJ IDEA
http://www.jetbrains.com/idea/training/demos/google_search.html
IntelliJ IDEAのプラグイン開発 - North Ground
http://kxbmap.hatenablog.com/entry/20111102/1320169073
ツイートするIntelliJプラグインを作ったよ - ギークに憧れて
http://hotchemi.hateblo.jp/entry/2013/01/07/013344
IntelliJ IDEAのプラグインを作ろう! - Qiita
http://qiita.com/Vexus2/items/e04a21f00e467b7ac8ad